
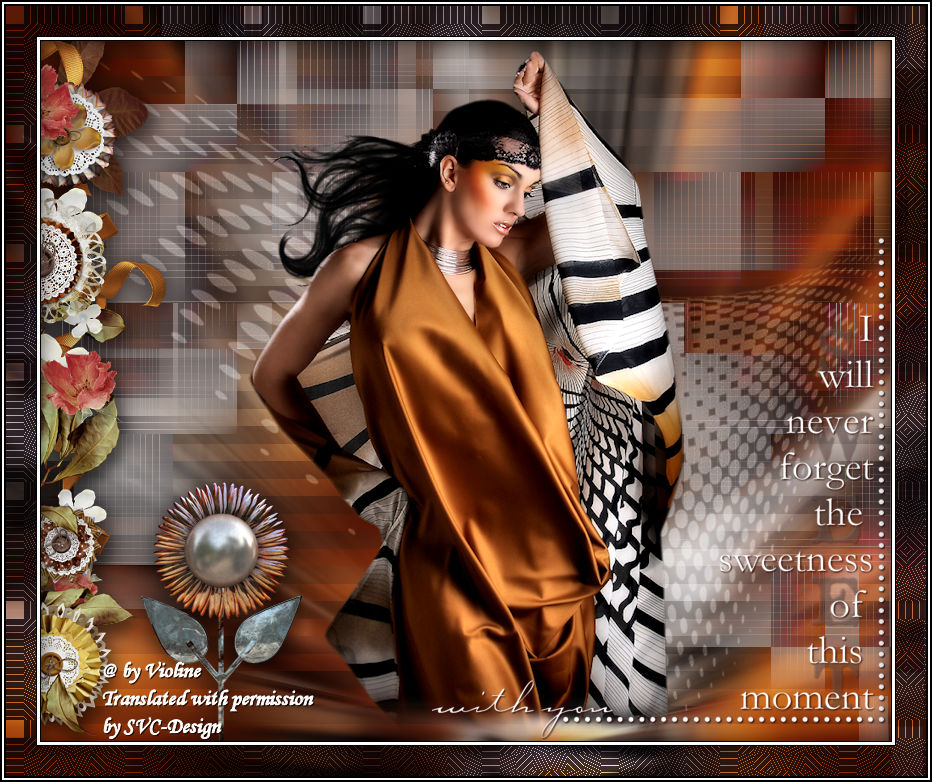
This lesson is made with PSPX2022
But is good with other versions.
© by SvC-Design

Materialen Download :
Here
******************************************************************
Materials:
0_1053b4_1d28a738_L.png
0_eef9a_47d229fc_orig.png
1206 Alpha 1.PspSelection
Narah_mask_0701.jpg
SSLisa - Dragonflies - Metal Flower 2.png
woman456_ByHebe.png
******************************************************************
Plugin:
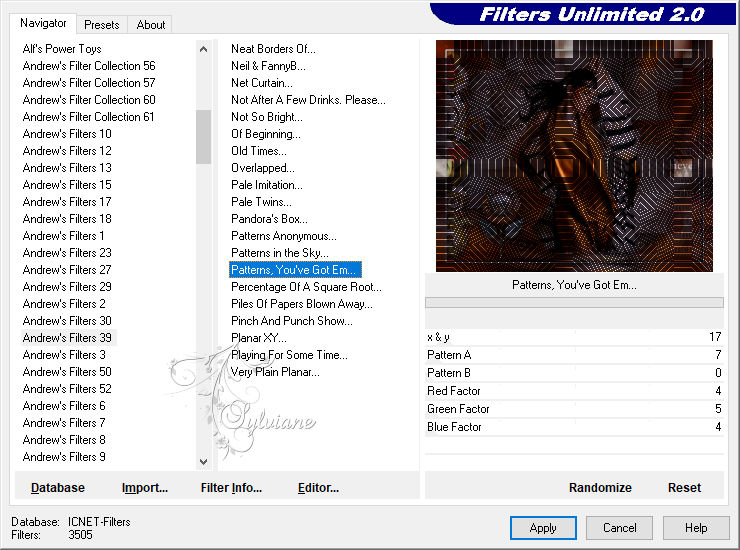
Plug-ins - Unlimited, Andrew's Filters 39 - Patterns, You've Got Em
plug-ins - Toadies - Weaver
plug-ins – Toadies - Look, Butthead, a TV!
******************************************************************
color palette
: No
******************************************************************
methode
When using other tubes and colors, the mixing mode and / or layer coverage may differ
******************************************************************
General Preparations:
First install your filters for your PSP!
Masks: Save to your mask folder in PSP, unless noted otherwise
Texture & Pattern: Save to your Texture Folder in PSP
Selections: Save to your folder Selections in PSP
Open your tubes in PSP
******************************************************************
We will start - Have fun!
Remember to save your work on a regular basis
******************************************************************
1.
Open a new transparent image of 850 X700 pixels
2.
Open woman456_ByHebe.png
Edit – Copy
3.
Selection - Select All
4.
Edit - Paste into selection
5.
Selection - Select None
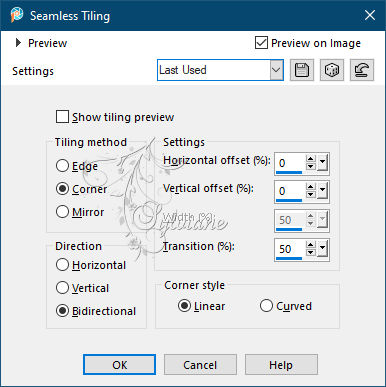
6.
Effects - Image Effects - Seamless Tiling
7.
Layer – merge – merge all (flatten)
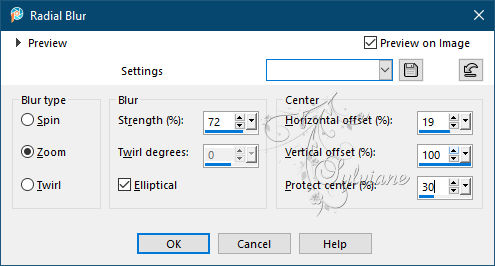
8.
Adjust - blur - radial blur
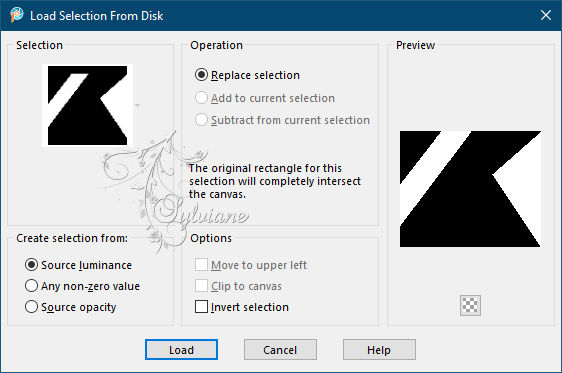
9.
Selections - Load / Save - Load selection from disk - 1206 Alpha 1.PspSelection
10.
Selections – Promote selections to layer
11.
Selection - Select None
12.
Plug-ins - Unlimited, Andrew's Filters 39 - Patterns, You've Got Em
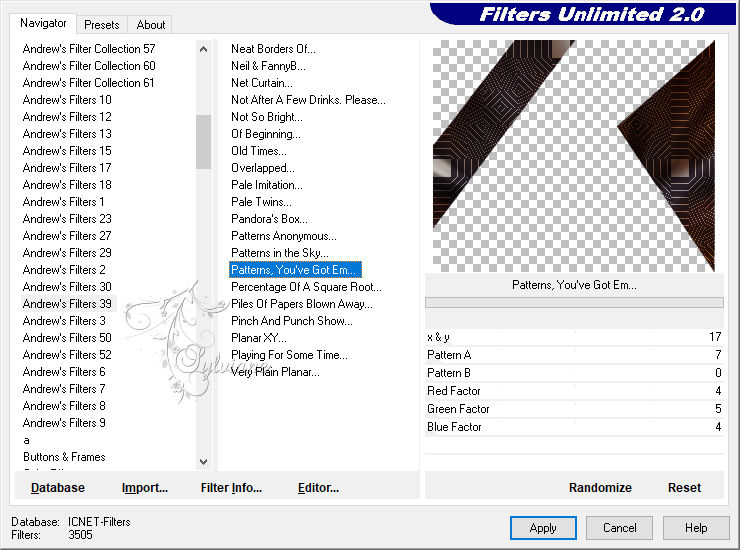
13.
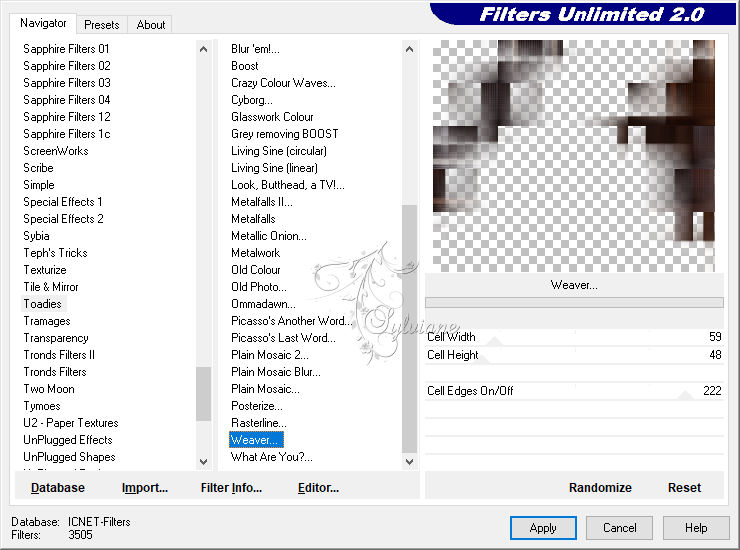
plug-ins - Toadies - Weaver
14.
blendmode: Lighten
15.
Activate de background
16.
Layers - Duplicate
17.
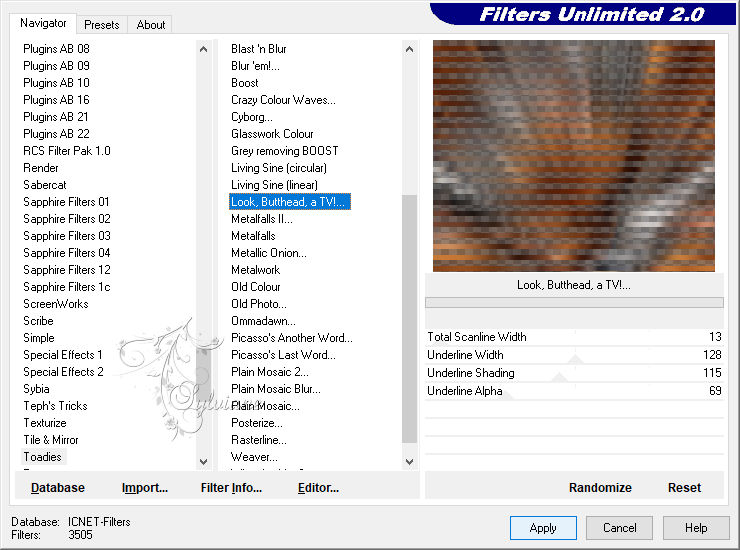
plug-ins – Toadies - Look, Butthead, a TV!
18.
blendmode: Soft light
19.
Layers - Merge - Merge visible layers
20.
Layers - New Raster Layer
fill with white color (ffffff)
21.
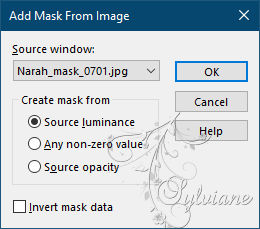
Layers - New Mask Layer - From Image - Narah_mask_0701
22.
Layers - Duplicate
23.
Layers - Merge - Merge Group
24.
blendmode: Soft light
25.
Effects - 3D effects - Drop shadow
0/0/70/30 color:#000000
26.
Layers - Merge - Merge visible layers
27.
Open 0_1053b4_1d28a738_L.png
Edit – Copy
Edit - Paste as new layer
28.
Image - Negative image
29.
Activate selection tool (Press K on your keyboard)
And enter the following parameters:
Pos X : 391 – Pos Y : 197
30.
Press M.
31.
Effects - 3D effects - drop shadow:
1/1/100/2 color#2f0801
32.
Activate Merged
33.
Open woman456_ByHebe.png
Edit – Copy
Edit - Paste as new layer
34.
Image - Mirror – mirror Horizontal
35.
Image, resize – 66%
36.
Activate selection tool (Press K on your keyboard)
And enter the following parameters:
Pos X :254 – Pos Y : 10
Press M.
37.
Open 0_eef9a_47d229fc_orig.png
Edit – Copy
Edit - Paste as new layer
Place left against the edge
38.
Effects - 3D effects - drop shadow
0/0/75/35 color:#000000
39.
Open SSLisa - Dragonflies - Metal Flower 2.png
Edit – Copy
Edit - Paste as new layer
40.
place as in the example
41.
Effects - 3D effects - drop shadow
0/0/75/35 color:#000000
42.
On the Merged layer
Edit - copy
Edit - paste as a new image
Set aside
We will use it to make our framework.
43 .
Layer – merge – merge all (flatten)
44 .
Layers - New Raster Layer
45.
Selection - Select All
46.
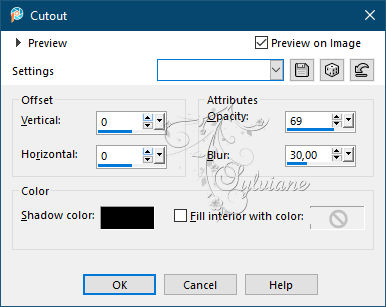
Effects - 3D effects – Cutout - black (000000)
47.
Selection - Select None
48.
Layer – merge – merge all (flatten)
49.
Image - add borders - 1 pixel – color:#000000
50.
Image - add borders - 3 pixels – color:#ffffff
51.
Image - add borders - 1 pixel – color:#000000
52.
Image - add borders - 30 pixels – color:#ffffff
53.
Image - add borders - 2 pixels – color:#000000
54.
activate the magic wand and select the border of 30 pixels
55
And paste in the selection
the image set aside in step 42
56.
Plug-ins - Unlimited - Andrew's Filters 39, Patterns, You've Got Em
57.
Selection - Select None
58.
Image - add borders - 2 pixels – color:#ffffff
59.
Image - add borders - 2 pixels – color:#000000
60.
put your watermark on it
Layer – merge – merge all (flatten)
61.
Image, resize to 850 pixels wide

Back
Copyright Translation © 2021 by SvC-Design